Showing posts with label Mill Girls. Show all posts

Friday, August 11, 2017

A finish

First, my hubby used bed springs as trellises in the garden for a real funky look- haha- as though weeds didn't get the funky look best.  Our cucumbers have tried "dozing" on the funky trellis. I bet he has a stiff back when he awakes.


I have a finish of epic proportions. tada!
I am so very happy to have this finish. I forgot to fasten the hanging sleeve down, so it is showing at the top. It is more than queen size but not king. The pattern was a block of the month designed by Nancy Rink called Mill girls. Each month's story was about life at a clothing mill in the 1800s, collected in the form of letters. It is a way of life, none of us could imagine. I loved piecing the blocks, the directions were great, but I let it languish when it was time to put it together. I was afraid, I didn't have the skill level, or the patience. But if I had waited much longer, I wouldn't have had the muscle strength to man handle it LOL.


The project I am working on this month, snow days, languished for many of the same reasons.

Now I can focus on it, and make progress. This was finish for a customer. I love her choice of colors.


I am linking to:
Finished or Not Fridays   
Whoop Whoop


Sunday, August 6, 2017

Stash report Aug 7, 2017


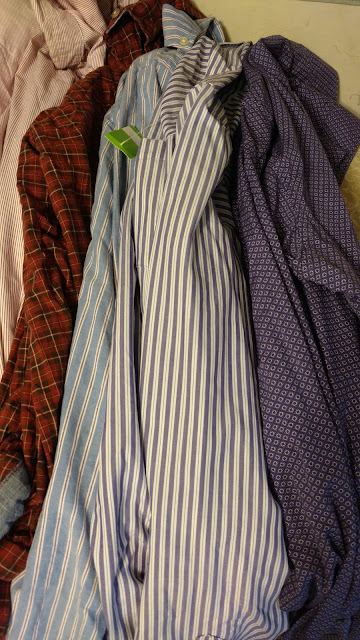
last year, i kept track of how many shirts I purchased at goodwill. This year I haven't been tallying, because I wasn't going to buy any more - ever. sigh....  But, a couple years ago, the trend in men's shirts was bright and pastel, and those shirts are now appearing at goodwill. It is really hard to resist pink and turquoise and purple. sigh...  And you can always use neutrals.  It was half price saturday...
How many shirts are too many? The flood gates are open....

I may need to change string Saturday to shirt Saturday.

Well at least I didn't buy any fabric


so for my day unplugged, I will be cutting shirts and binding a quilt- hooray.


Stash report

Fabric Used this Week 0 yards
Fabric Used year to Date: 250 1/2 yards


Fabric Added this Week:0 yards
Fabric Added Year to Date: 247 yards


Net Fabric for 2017: 3 1/2 yards used more than added.


I am linking to:


Slow Sunday Stitching
sharing Sunday

Friday, August 4, 2017

how i do the glitter block

mill girls is on the long arm frame with a wool batt.


woohoo - I am taking my time on this one.

I took pictures of my process on the Jen Kingwell glitter block. Maybe it will help someone else.
There are several pieces to the block and I need to use the templates for marking at the machine. There are 5 pieces of the main fabric 4 pieces of the  accent fabric and 4 pieces of background fabric. They need a press.


Since there are 2 seams for the center, I start with that seam. I line up the main fabric square and an accent square and sew the seam completely.
The rest of the accent squares are lined up with the upper left side of the main blade. I make a pencil mark on the outside hole. I hold the blade pieces with the wide point at the top. A mechanical pencil is the only marking instrument that is small enough to fit in the hole.
Then I can sew from the tip to that point, back stitch ,and turn the piece so I can chain the next one.


I can clip off the first patches from the back of the machine, and then I add the second accent square to the first squares to make a threesome.


Next I add the triangle to blade shaped piece on the far right I know I need a long straight line so that's how I remember how to place the triangle.
Next I sew these two units together. I have to mark the the 1/4 inch seam at the left but can sew all the way through on the right.

Here I have to add some other leader / ender piece, in this case the kite block, to keep the chain going.
I add the the other blade piece to the unit again marking and back stitching the square that is on the outside of the blade piece.

The next step is to add the background pieces with a y seam. I will post about that later.
I am off to make a pass on mill girls.

I am linking to:
Finished or Not Fridays   
Whoop Whoop


Monday, July 31, 2017

one monthly goal mill girls bom

Mill girls is a completed top. I have added the last border....


and mitered the corners...


and it is ready to be quilted...


I have the back on the frame, and the binding ready to attach. The only reason it is not completely finished is that my husband said he thought the quilt deserved a wool batt and to be on our bed. I told him that would be expensive but he insisted, so I ordered one, but it hasn't come yet. The minute it does arrive, I will quilt and bind the quilt.

I can't believe it is this close to finished. I am ecstatic.

This was my one monthly goal for July,and my Ufo 2017 project, and I was afraid I would not get very far on it. I consider it a finish. Here I was at the beginning

I am linking to:
Making Monday
main Crush Monday

Friday, July 28, 2017

Mill girls Last border


I have started working on the last border for Mill girls. I am soooo close. I have just now realized I would need to order a wool batting for it.It may not get here in time to finish by the end of the month. fingers crossed. I still might be counting my chickens before they are hatched since it is not even finished yet. The last border is actually 3 pieces , a 1 1/2 inch red tonal, a 3 1/2 inch floral and a fussy cut 7 1/2 inch blue strip with red on either side.
First I needed to square up the corners and sides as best as I could.


Actually it was pretty good, just little bits here and there that needed to go.


All the border pieces are together x 4. I really like the idea of building a border before adding it to the quilt. I think it is spectacular. I am really loving the quilt so far. When this border is added, it will need to be mitered in each corner.


Today is a one location shop hop in town. I am deciding whether or not to go. I don't shouldn't need to add anything to my burgeoning stuff, but I hate to miss anything. geesh I have added more fabric lately than I can handle - it's bad when it is still in the sack. But new pretties are calling out and I Can hear them.....

I am linking to:
Finished or Not Fridays   
Whoop Whoop

Wednesday, July 26, 2017

rug hooking again


whew - this set of borders is done and it is getting huge and heavy. I hope it is not so boring seeing pictures and more of the same. It is getting close to the end of the month, and I would like it finished for my one monthly goal. So I am really focusing on it. One final border to go.


I haven't been to my rug hooking group for most of the summer. I haven't felt energetic enough.  I have missed the ladies and the inspiration. It is no surprise, then, that I haven't done much with my rug hooking project. But Carol called and said they had missed me, and hoped I would be returning soon. Gee.. that felt nice. So I bucked up, rounded up my stuff and headed to rug hooking.

The projects are always amazing.
geometric

floral

animal (cat)


Mr Bunny
all at different stages  and colors - yummy colors.

It was great to see everyone and catch up with the hatches, matches, and dispatches. And I remember, that I really do like to rug hook.

Here is a new to me link that looks fun


and all my favorites:

WOW
Midweek Makers
Jo's Country Junction UFO
Bee Social
Silly Mama WIP

WIPs with friends

Tuesday, July 25, 2017

side borders


I have two borders on Mill girls. I needed to piece these using the monthly blocks that were made in the first months of the block of the month. The setting triangles were cut as part of month nine.
All the dark setting triangles are for the side towards the quilt. And the lights are for the outside edge.


only 2 more to go


3 more glitter blocks ( Jen Kingwell)

I am linking to:
Free Motion by the River
to do tuesday
too cute tuesday

Wednesday, July 19, 2017

Mitered borders


After, I had the fussy cut border on Mill girls, it was time to miter the corners. The pattern called for varying lengths of strips in the border, preparing for the miter. I folded the quilt block itself on the diagonal, and that helped line up the borders on two sides. I pinned and pinned and then pinned some more. One hint: at the attached part of the border make sure the seam allowance in pushed up away from the border toward the quilt.It helps to find the sweet spot to start sewing.


I slid the ruler, using the 45 degree line on the actual stitching line until I reached the point where the stitching stopped. I drew the line with a frixion pen. And stitched on that line from the quilt outward to the corner.
And then I cut off the extra. oooo scarey. I pressed the seam open and the tip at the quilt down toward the miter.


And I was thrilled with how well they mitered. All the lines were continuous. yipee.

It is getting bigger and heavier. Next round will include all the 6 inch blocks that were made in the very early months. I thought the blocks would be the hardest to do, but seems easy peasy at this point.
I am still not happy about the four patch border being a little big. I wish there had been some measurement guidelines along the way to know if it was going to fit.

Summer has been a blur.....

I am linking to:
WOW
Midweek Makers
Jo's Country Junction UFO
Bee Social
Silly Mama WIP

WIPs with friends

Tuesday, July 18, 2017

red borders

I am adding the red borders to mill girls. I am matching the centers and working out toward the edges which, with fingers crossed, will be mitered.


I have a few more box kite blocks finished. I sew these in between other sewing.


and three more glitter blocks ( Jen Kingwell). These were more practice than anything else.


I think I have a system for the glitter blocks which is working. I have tried several different options. I will have to share that later.

I am linking to:
Free Motion by the River
to do tuesday
too cute tuesday

Friday, July 14, 2017

Progress is progress


I fussy cut and pieced the next four border pieces for Mill Girls. I measured and measured and measured. I am so afraid I will cut these next pieces and make a mistake and not have enough fabric to finish. These borders are to be mitered sigh.....


 I tried 3 glitter blocks (a design by Jen Kingwell). I am getting better at piecing them with each one I make. I am using scraps from the estate sale, oldies but goodies.The quilt is big enough that I can sneak in some uglies. Maybe I will learn to love those pesky y seams.


I have made several box kite blocks ( Bonnie Hunter). Most of the prints, I cut for two . But with 120 blocks, I don't think anyone will notice. These are really easy to assemble in 9 patch style. And so cute! The bottom right fabric is a vintage piece, only 36 inches wide. I think it will fit right in with the others.

I am linking to:
Finished or Not Fridays   
Whoop Whoop
crazy mom quilts


Confessions Of A Fabric Addict

Tuesday, July 11, 2017

mill girls and Greentown glass

I have the center medallion finished on mill girls quilt

The 4 patch border is a little big, and I am not sure how to fix that. Maybe it will work itself out if I add the next borders.

Hubby's Aunt has downsized and had an auction last weekend. I wasn't able to go. After living in this area all my life, I have always wanted a piece of green town glass.  My husband purchased these pieces for me. I am very excited. Greentown glass was made from 1894 to 1903 when the factory was destroyed by fire.
Probably the most recognizable pieces are the chocolate pieces created by the chemist Jacob Rosenthal.


The yellow is vaseline glass and some of her silver - she loved to entertain with fancy stuff. It was such a surprise when I came home and had these waiting for me.

I am linking to:
Fiber Tuesday -
Free Motion by the River
to do tuesday
too cute tuesday